Upgrading HPS lighting to LED can reduce energy use, maintenance visits, and heat around demanding work areas. However, successful results depend on more than replacing one lamp with another. This guide explains how to upgrade traditional high pressure sodium lights to led safely, accurately, and with realistic expectations.
A typical HPS fixture may contain a ballast, ignitor, reflector, socket, and aging wiring. Each part affects LED compatibility. Before purchasing equipment, record the lamp wattage, fixture model, mounting height, beam angle, voltage, and operating environment. A licensed electrician should inspect the circuit and confirm whether ballast-bypass wiring is required. Turn power off completely. Verify it before touching anything.
Small details matter. A warehouse aisle may need uniform illumination, while a parking area may require wider distribution and better glare control. LED color temperature also changes the visual experience. A 4000K lamp can make shelves and labels appear clearer, but it may feel harsher than familiar amber HPS light. The wrong retrofit can create dark patches, flicker, or unexpected shutdowns. It happens.
This 2026 guide compares retrofit lamps, LED corn bulbs, and complete fixture replacements. It discusses photometric files, driver quality, thermal management, controls, installation costs, and long-term maintenance. It also addresses responsible recycling for removed lamps and ballasts. Claims about savings should be checked against operating hours, electricity rates, and actual measured performance. Not every upgrade pays back quickly. A careful site survey often reveals the better answer.
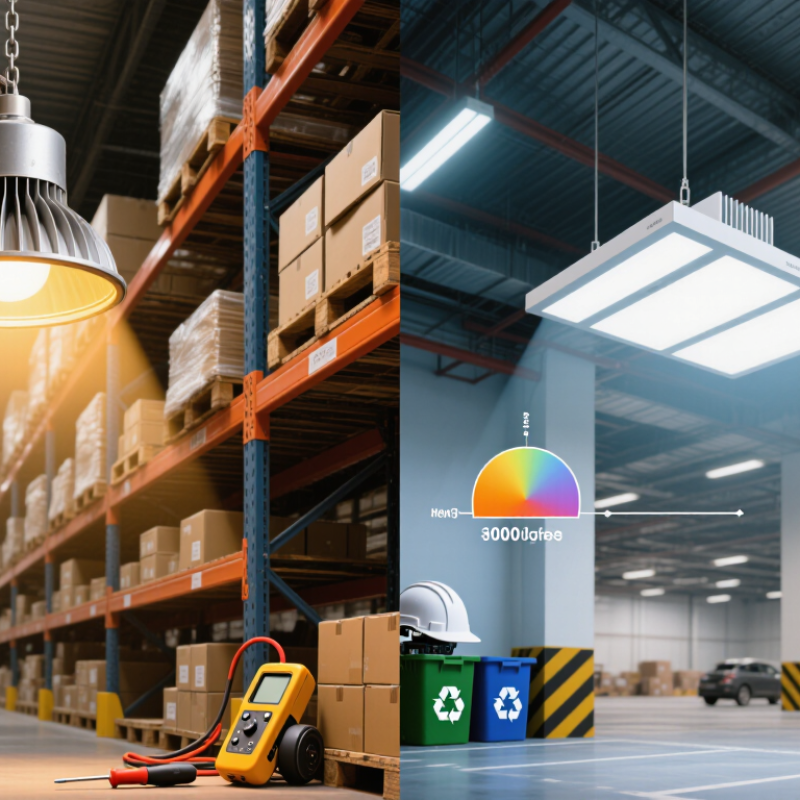
Why Upgrade HPS Lighting to LED in 2026?
Replacing HPS fixtures with LED systems can reduce electricity demand, heat, and maintenance in controlled growing environments. The International Energy Agency reports that lighting uses about 15% of global electricity. That makes efficiency upgrades increasingly practical in 2026. The U.S. Department of Energy’s 2023 solid-state lighting report identifies LED packages exceeding 200 lumens per watt in laboratory conditions. Installed fixtures perform lower, but the improvement remains significant.
Less heat matters.
HPS lamps release substantial radiant heat above the canopy. LED fixtures can place light closer to plants while reducing cooling pressure, depending on room design and airflow. A 2024 horticultural lighting review found modern LED fixtures commonly reaching roughly 2.5 to 3.5 micromoles per joule, while many older HPS systems remain near 1.3 to 1.9. Actual savings depend on dimming, mounting height, utility rates, and operating hours. The numbers are not universal.
Upgrade carefully, not blindly. Measure current power draw, canopy temperature, light distribution, and maintenance costs before replacing fixtures. LED conversions can create darker edges or excessive intensity when optics are poorly matched. The U.S. Department of Energy also notes that real-world performance differs from laboratory ratings. That gap deserves attention. A higher-efficiency fixture may still disappoint if controls, ventilation, or electrical capacity remain unchanged.
| Evaluation Dimension | Existing HPS Lighting | Typical LED Upgrade Target | Expected Result or Upgrade Consideration |
|---|---|---|---|
| Typical fixture power | 400–1,000 W per fixture, excluding ballast losses | 200–600 W for a comparable horticultural lighting application | The replacement wattage must be selected according to required light levels, mounting height, coverage, and crop or task requirements. |
| Electrical efficacy | Approximately 1.0–1.7 µmol/J for many HPS systems | Approximately 2.3–3.5 µmol/J for current high-efficiency LED fixtures | LEDs can produce more photosynthetic light per unit of electricity, but the actual result depends on fixture optics and operating conditions. |
| Energy consumption | Higher consumption because of lamp power and ballast losses | Often 25–55% lower input power for an equivalent lighting plan | Savings should be calculated from measured fixture wattage, operating hours, and the local electricity tariff. |
| Useful operating life | Commonly about 10,000–24,000 hours, with light output declining over time | Commonly about 50,000–100,000 hours to an L70 rating, depending on design and temperature | LED replacement can reduce relamping frequency, but the rated life should be checked against the manufacturer’s test conditions. |
| Light depreciation | Lamp output gradually decreases; scheduled replacement is often needed before complete failure | Output also declines gradually, commonly specified by an L70 or similar rating | Use a planned maintenance schedule and clean lenses or reflectors to preserve delivered light. |
| Warm-up and restart | Requires warm-up time and may need several minutes to restart after power interruption | Instant-on operation and rapid control response are generally available | Useful for automated schedules, occupancy sensors, dimming, and frequent on/off operation. |
| Dimming and control | Limited dimming capability; ballast compatibility must be verified | Many fixtures support 0–10 V dimming or digital control, subject to the selected driver | Confirm control protocols, wiring, emergency operation, and compatibility before installation. |
| Heat load | Higher electrical input generally creates a higher indoor heat load | Lower wattage can reduce fixture heat released into the space | All consumed electrical energy ultimately becomes heat indoors; HVAC savings depend on the facility, season, and operating schedule. |
| Light distribution | Often relies on reflectors and may produce less uniform coverage at the edges | Can use purpose-designed optics and multiple light-emitting points for more uniform coverage | Photometric or PPFD mapping should be completed at the actual mounting height. |
| Environmental operating range | Performance can be affected by ambient temperature and ballast conditions | Performance is also temperature-dependent; heat sinking and ventilation remain important | Do not enclose an LED fixture unless its installation instructions permit it. |
| Maintenance requirements | Lamp, socket, reflector, and ballast inspection may be required | Usually fewer lamp replacements, but driver, connector, lens, and thermal inspection remain necessary | A lower-maintenance system is not maintenance-free. |
| Illustrative annual energy use | 100 fixtures × 600 W × 12 hours/day × 365 days = 262,800 kWh/year | 100 fixtures × 350 W × 12 hours/day × 365 days = 153,300 kWh/year | 109,500 kWh/year potential reduction, equal to approximately 41.7% in this example. |
| Illustrative electricity cost | At $0.15/kWh: $39,420/year | At $0.15/kWh: $22,995/year | $16,425/year electricity-cost reduction before demand charges, taxes, and HVAC effects. |
| Illustrative simple payback | Not applicable to the existing system | Assumed installed upgrade cost: 100 × $525 = $52,500 | Approximately 3.2 years based only on the electricity saving in this example. Actual payback varies by project cost, tariff, hours, rebates, and HVAC impact. |
| Recommended upgrade process | Document existing wattage, light levels, mounting height, circuit capacity, and control method | Select a properly rated LED fixture, verify photometric performance, and commission the system | Audit first, model the replacement, confirm electrical and thermal compatibility, install safely, then measure light levels and energy use after commissioning. |
Note: Figures are typical industry ranges or clearly identified illustrative calculations. Actual performance depends on fixture design, operating temperature, installation geometry, maintenance, electricity rates, and required light levels.
LED systems can reduce electricity demand, radiant heat, and maintenance in controlled growing rooms. Actual savings vary. They are not automatic.
Modern LEDs may reach about 2.5–3.5 micromoles per joule. Older HPS systems often reach about 1.3–1.9 micromoles per joule. Installed results can be lower.
Usually not. LED fixtures may need different spacing, mounting heights, and quantities for even coverage. A direct one-for-one replacement can create dark edges.
Record lamp wattage, ballast demand, operating hours, canopy height, light levels, temperatures, and maintenance costs. Measure PPFD at canopy height, not only fixture labels.
No. LEDs usually reduce radiant heat, but their drivers still produce heat. Provide airflow, clearance, and suitable ventilation. Less heat is not no heat.
Measure power draw and light levels at fixed points after the fixtures reach normal temperature. Check bright centers, dark corners, flicker, and color stability.
A qualified electrician should verify wiring, circuit capacity, dimming compatibility, mounting, and isolation procedures. Inspect loose connections and hot terminals with suitable equipment.
Clean lenses and heat sinks according to the instructions. Record operating hours, power readings, temperatures, and faults. Repeat light measurements after cleaning.
Choosing fixtures from labels alone can produce uneven coverage or excessive intensity. A single brightness reading once misled me. I missed weak lighting near aisle ends.
No. Lower power may still provide poor coverage. Compare usable light, uniformity, heat, controls, and total operating conditions. The numbers need context.
This 2026 guide explains how to upgrade traditional high pressure sodium lights to led by comparing the practical, energy, and maintenance requirements of both systems. It covers how LED technology can improve efficiency, reduce heat output, extend service life, and provide more consistent lighting when the replacement is properly planned. Readers will learn how to evaluate existing fixtures, electrical capacity, mounting conditions, light levels, coverage, and control needs before selecting a suitable LED solution for the space.
The guide also outlines the main installation and configuration steps, including safe power isolation, fixture placement, wiring checks, dimming setup, and adjustment of light distribution. After installation, performance should be tested by checking illumination, operating temperature, power consumption, and system stability. Regular cleaning, connection inspections, and performance reviews can help maintain reliable operation and maximize the long-term benefits of the upgraded lighting system.

 Lukas Lighting